Saturday, September 7, 2013

One Last Summer Fling!

Oh, summer...how I love you.  I can't believe you left us so soon.  I will miss your sunny goodness.  Lounging poolside.  Trips to the beach.  Soaking up the sun.  Delicious summer fruits and vegetables.

*sigh*

Is it just me, or did this summer go by FAST?

One of my favorite summer treats is fresh, sweet corn on the cob.  The last time I went grocery shopping, Walmart had a great sale on corn, so I snatched some up.  Then, I put in in the fridge and forgot about it.

Oops.

By the time I got around to making it, the corn had lost some of its summery perfection.  Don't get me wrong - it was still beautiful.  Just...not quite as beautiful as when I first got it.  Some of us get better with age, but unfortunately for this beautiful sweet treat, fresh corn really should be eaten as soon as it's picked.

As I was pondering what to do with these less-than-perfect summer gems, it hit me.  There isn't a food on the planet that doesn't benefit from a little butter and cream.  And corn is no different!  Plus, it was SUPER easy to make, and it turned out GREAT!!


The Cast:
Fresh corn on the cob (I had 5 of them)
Butter (2-3 Tbsp)
Heavy Cream (1/2 cup)
Salt, Pepper, and Sugar to taste


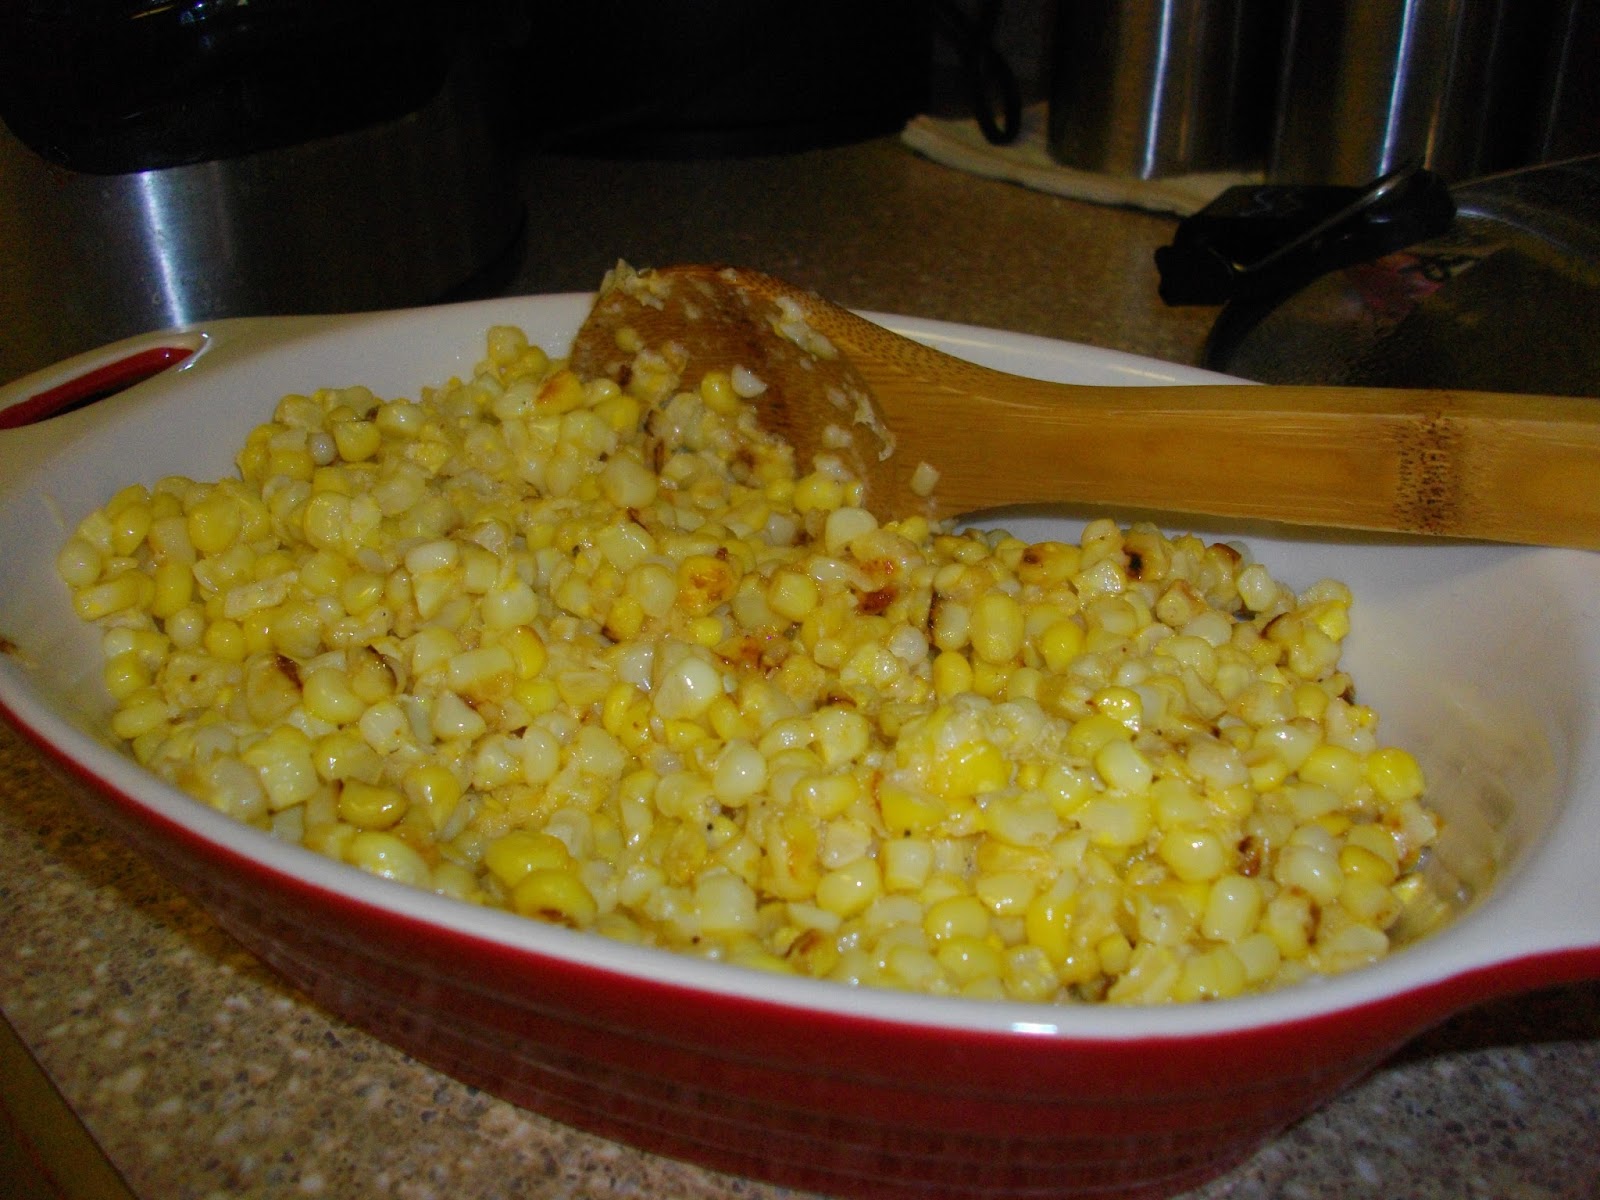
Use a sharp knife to remove the kernels of corn from the cobs.  Then, use the back of the knife (or a spoon) to give the naked cobs a good scrape to get all of the sweet, corny, milky goodness left on the cobs.  There is a lot of liquid left in there!  I cut and scraped directly into a saucepan, then added a little bit of butter (about 3 Tbsp) and the cream.  If your corn isn't sweet enough, add a touch of sugar, and season with salt and pepper.  Then, just simmer the corny, creamy  mixture until it's nice and tender, about 15 minutes.

That's it!


I let mine to a little too long without watching it, and the cream evaporated too much.  Some of the kernels got a little brown.  But that's ok!  It was still delicious!  Next time, I won't walk away while it's cooking (I have a bad habit of doing that!) and add a little milk if it starts to evaporate too much. 

The ultimate test is the family - if they don't like something, I'll never make it again.  What did they think of my creamed corn?


As you can see, they thought it was awful.  ;)

Thursday, September 5, 2013

Back to School - International Cuisine Thursday!! :)

I am SO excited to be back in school.  I have more cooking classes this semester, and if today's class was any indication, they are going to be GREAT!

Thursdays, I have International Cuisine.  Today's class was China and Korea.  Boy, did we cook!!

Here is what we made!!

China:
  • Hot & Sour Soup
  • Pot Stickers
  • Stir-Fried Bok Choy
  • Porcupine Meatballs
  • Emerald Shrimp
  • Fried Rice
  • Bean Curd in Oyster Sauce
 
Korea:
  • Beef Bulgogi
  • Seasoned Soy
  • Vinegar Soy
  • Spicy Radish
  • Seasoned Mushrooms
  • Korean Pancakes
  • Quick Kimchi


My friend and I were in charge of the Stir-Fried Bok Choy and Porcupine Meatballs.  I had never had either of them, so it was a great experience! 

For the Porcupine Meatballs, we ground our own pork using the grinder attachment for the KitchenAid Mixer.  I REALLY want this attachment - it was so nice!!  They also had lots of ginger, spices, and bamboo shoots.  After shaping, the meatballs were rolled in glutinous rice and steamed.  After they were cooked, we took some of them and threw them in the deep fryer.  The rice got crispy and was SO delicious...I loved the mix of textures in the fried meatballs.  We served them with a sauce made of rice vinegar and ginger.  We had some leftover pork filling and used it in two ways - wrapped in wonton wrappers and deep fried, and made into little patties and fried on the stovetop.  Every bite was great!


The Stir-Fried Bok Choy we made was so easy - the hardest part was chopping up all of the vegetables!  It had bok choy (duh), mushrooms, and onions, quickly stir-fried and finished with a little chicken stock and sesame oil, thickened with cornstarch.  Simply delicious!!


This class is going to be great - I can tell already!  We all worked really well together, and everybody pulled their weight in the kitchen, so there wasn't any one person stuck doing all the work.  I am EXCITED about this delicious new semester!!


Next International Cuisine class, we are going to Japan...I can't wait to see what yummies we are going to make!!!  :)


Wednesday, September 4, 2013

Cherry Cream Cheese Coffee Cake

Cherry Cream Cheese Coffee Cake.  Sounds yummy, doesn't it?


The inspiration was this post on Shugary Sweets.  I wanted to make something sugar-free and fruity for my hubby though, so I ended up with my cherry version.  And boy, did it turn out GOOD!!

The Cast - Cake:

Flour
Splenda
Baking Powder
Baking Soda
Salt
Butter
Eggs
Vanilla Extract
Buttermilk  (I didn't have any buttermilk, so I made my own with vinegar and milk.)

Cream Cheese Filling:

Cream Cheese
Eggs
Splenda
Cherries (I used 1 can no-sugar-added cherry pie filling)


Mix all dry ingredients together.  Add softened butter.  (If you forget to take your butter out of the fridge like I did, just use your grater to grate the butter!  It worked perfectly!


Mix together until the butter is incorporated and crumbly.


Add the wet ingredients and mix well until it's well-mixed and fluffy.


Spread half of the cake batter into a greased and floured 13x9 inch pan.  Set the other half aside.


In another bowl, mix together the cream cheese, eggs, and Splenda.  If you are planning on posting on your blog, it would help if you remember to take pictures.  Oops.

Spread the cream cheese mixture over the batter in the pan.


Spread the remaining cake batter over the cream cheese.  I used a scoop to scoop out blobs of batter to make it easier to spread.


The batter is pretty sticky, so just work it the best you can to get it as spread out as possible.  It doesn't have to be perfect - the cherries will cover up a lot!


And speaking of cherries....open that can and spread it on top of the cake batter!


Pop this baby into a 325 degree oven.  The original recipe says 45 minutes, but I ended up baking it for about 55.  My oven is a poky little puppy!

Behold...the finished Cherry Cream Cheese Coffee Cake!

 
Delicious!!


The Full Recipe (My revised version):

Cherry Cream Cheese Coffee Cake

Adapted from Shugary Sweets

For the Cake:
  • 2 1/2 cup all purpose flour
  • 1 cup Splenda
  • 1/2 tsp baking powder
  • 1/2 tsp baking soda
  • 1/4 tsp kosher salt
  • 3/4 cup unsalted butter, softened
  • 3 eggs
  • 2 tsp vanilla extract
  • 2/3 cup buttermilk
For the Filling:
  • 2 pkg (8oz each) cream cheese, softened
  • 1/2 cup Splenda
  • 1 egg
  • 1 can No-Sugar-Added Cherry Pie Filling
 
Instructions
  1. For the cake, grease and flour a 13x9 baking dish and set aside. In a mixing bowl, beat flour, Splenda, baking powder, baking soda and salt on low until combined. Beat in softened butter until mixture is crumbly. Add in eggs, vanilla and buttermilk and beat until fully combined and fluffy. Pour half the batter into baking dish, spreading evenly.
  2. In a separate mixing bowl, beat cream cheese, Splenda and egg until light and fluffy, about 3-5 minutes. Pour over batter. Top with remaining half of cake batter.
  3. Spread pie filling over the top.
  4. Bake cake in a 325 degree oven for about 45 minutes, until fully cooked. Cool completely and serve.


Sunday, September 1, 2013

The Best Carrot Cake EVER!!


Mmmmm...carrot cake...

I LOVE carrot cake.  Especially GOOD carrot cake.  So when I found this post on Sally's Baking Addiction, I knew I had to try it.

And boy, am I glad I did!  I think our card-playing guests from last night are glad I did, too!!

Not only was it super-delicious, but it was super-easy to make, too!

The Cast:
 
  • Brown Sugar
  • Vegetable Oil
  • Banana Yogurt (the original recipe called for Greek yogurt but if you read my previous post, you know I didn't have any!  lol)
  • Eggs
  • Vanilla Extract
  • Baking Soda
  • Cinnamon
  • Nutmeg
  • Salt
  • Flour
  • Carrots
  • Almonds (the original recipe called for pecans, but I didn't have any)
  • Craisins (another change from the original recipe!)

This recipe calls for the carrots to be finely shredded.  I used the shredding disk on my food processor, but I didn't think they were fine enough, so I ended up switching to the regular blade to get them nice and fine.


After removing and measuring the carrots, I ground up my almonds in the food processor.  I like the texture they ended up being - some fine, some chunky.  Measure those and set aside, too.  But make sure you forget to take a picture of that step!

Next, the oil and brown sugar are mixed together using either a stand mixer or hand mixer.


Next, add in the yogurt.  (Action shot!)


After the yogurt is mixed in, add the eggs, 1 at a time, beating between each one until they are incorporated.


I also add my spices and baking soda into the wet ingredients at this point.  I hate dirtying an extra bowl to mix them with the flour! 

I also "added" my whole nutmeg at this point (oops!) and had to fish it out of the bowl.  TWICE. 


Add the flour and mix just until it is incorporated.  Do not overmix.


Add the carrots, almonds, and Craisins.


Mix until incorporated.  Get a spoon and have a bite or two, just to test it out.  (This is THE most important step in baking if you ask me!)


Spread it into a greased Springform pan and pop that baby into the oven!


The original recipe says to bake at 350 for 32 to 38 minutes.  I took mine out after 35 minutes, but I really should have baked it longer.  The middle ended up not quite done.  I was paranoid about OVER baking it though!!  Next time, I will definitely do it at LEAST 40 minutes!


Now is the hardest part...let it cool completely.  Luckily, we had people coming over the night I made this, so I had some cleaning up to do.  Otherwise...who knows if the cake would have ended up intact.  It smelled THAT GOOD!

The fact that I had THIS huge mess to clean up after making my cake didn't hurt!


I am SUCH a messy cook.  I end up tossing all of the dishes in one side of the sink and the trash in the other as I cook, then clean it all up at the end. 

Once the messy sink is clean, the living room is vacuumed, and the cake is completely cool, it's time to frost!


The Cast:

Cream Cheese, Softened
Butter, Softened
Powdered Sugar
Vanilla Extract
Heavy Cream


Cream the cream cheese together until they are thoroughly mixed and fluffy.


Mix in the powdered sugar and vanilla until combined, then mix in vanilla and heavy cream.


I beat the heck out of mine so it was SUPER light and fluffy.  I got SO many compliments on the frosting! 

Remove the cake from the Springform pan and turn it out onto your serving platter.  Spread the top with the frosting, then sprinkle with almonds.


Get ready for a slice of heaven.  This carrot cake is SO moist and delicious.  The almonds get soft, but still have enough crunch to give it some texture.  The Craisins add the perfect little bursts of sweet, tart flavor.  And the frosting - oh man, was it good! So light and fluffy...I'm drooling just thinking about it!!

The original recipe says this cake will last up to 6 days at room temperature.  I don't see how this cake could last ANYWHERE for 6 days - I made it a day ago, and it is almost gone already!  Only one piece left!!  I am DEFINITELY going to be making this cake again and again!!

Sunday, August 25, 2013

Name This Dessert!

An actual COOKING post?  Whaaaaaaaaaat??  Say it ain't so!! 

I know, I know...it's been FOREVER since I posted a food post on my food blog.  But tonight, I am INSPIRED!

First, a little bit about how this came to be.

Let me start by saying our kitchen is the most pitiful kitchen I've ever seen.  Right now, we are out of EVERYTHING.  No butter, no milk, no eggs...it's definitely time to go grocery shopping.  I'm sure we will get to it eventually.  But...what do we do in the meantime??

Improvise!! 

We were trying to figure out what to do for dessert.  Looking for dessert with no butter is no easy feat, but I found this recipe for Blueberry, Lemon & Greek Yogurt Cookies and thought they sounded delicious.  Using this recipe as a base and switching out some ingredients that I didn't have, I managed to come up with these:


But...what are they?  They are kinda like a cookie...but not as flat.  They are soft and pillowy.  They remind me of a muffin top, but they are more...cookie-ish.  Muffookies?  Cookintops? 

Whatever you call them...they are delicious!!

Here is my adapted recipe!

Craisin, Lemon and Greek Yogurt Cookies
Adapted from Honey & Molasses

Ingredients:

2 cups all-purpose flour
1 1/2 tsp baking powder
1/2 tsp baking soda
1/4 tsp salt
1 cup sugar
1 1/4 cup Greek yogurt *
1 egg, lightly beaten
Zest of 1 lemon
1 tsp fresh lemon juice
1/2 tsp vanilla extract
1 cup Craisins

* Note:  I had a 5.3 oz container of Greek yogurt.  I used that plus enough sour cream to equal 1 1/4 cup.

1.  Preaheat oven to 375°F.
2.  In a bowl, combine baking powder, baking soda, salt, sugar, yogurt (and sour cream), egg, lemon zest, lemon juice, and vanilla.  I did this in my Kitchenaid mixer and beat until fully combined.  Add flour and Craisins and mix until smooth.
3.  Line baking sheet with parchment and drop 2 tablespoon-sized dollops of batter about 1 inch apart.  (My Pampered Chef Medium Scoop was the perfect size for this!)
4.  Bake for 15 minutes, or until they look "done".  Since there is no butter, they will not brown, but they will puff up and look set.  Carefully transfer to  a cooling rack and try to wait long enough for them to cool before devouring them.  (Good luck with that!)

Don't be concerned if the dough seems to wet - this is exactly how it should be.  More batter-ish than dough-ish.

 
I thought they would spread a lot, but they really didn't


I think they would be yummy with a little lemoney-powdered sugar glaze, but my honey thought they were good the way they are!  


Now...go make some cookies!!  :) :)


Sunday, August 4, 2013

A rosette by any other name...

Here's my latest project!  I found the cutest rosette crochet pattern on Cre8tion Crochet, and I just HAD to make them! 

I am so new to crocheting, and I know I need a lot of practice...but I think they turned out cute!  :)


Thursday, July 18, 2013

My Latest Project!

Yes, I know that my last 2 posts have had absolutely nothing to do with cooking. On a blog called "Cooking with Shelly T."

Well....this one isn't about cooking either!!

Since I am out of school for the summer, instead of cooking, my days are filled with kids and crafts. A couple of weeks ago, we went to our local library for craft time. One of the librarians were teaching the kids to crochet, and I asked if I could sit in. Then...of course...the kids lost interest. That didn't stop me from learning though!! Crocheting has been on my list of things I want to learn for a LONG time, and I was so excited to learn!

After practicing my stitches for a while, I was ready to actually MAKE something other than a square. Then I saw THIS Free Market Tote Crochet Pattern and thought it would be the perfect first project.

First, I had to figure out how to decipher the pattern, which I was pretty sure wasn't actually written in English. Luckily, I found a great website to help with that! Once I figured out the pattern, I was off and crocheting!


I was off to a good start, crocheting my little heart out. THEN I realized that I made a mistake and had to unravel some. Then I had to deal with a tangled pile of yarn. Oops.


Once I started doing it CORRECTLY, it went much quicker!  I am SO excited to have actually finished it!


Then...I tried to make a flower to go on it, like in the original pattern.  But apparently, my skills aren't THAT refined yet - because I failed miserably.  Multiple times.  (And no, I'm not afraid to admit it!)

Then, I decided to try this cute little bow!


I wish I had a solid contrasting color to make it in, but I didn't.  I still think it's kinda cute and calico-ish!

Here is the finished product, all full of yarn!  :)


Thank you to Daisy Cottage Designs for the great free patterns!  :)

Saturday, April 27, 2013

Breathing Room!

Man, it's been a lot time since I posted!  Things have been crazy busy the past month!

I am happy that the semester is almost over - I only have 1 final exam left!  Bummed that my Food Prep Friday is over though - that was the BEST class!!

That's me at the very right of the front row with the pink phone peeking out of my pocket...lol
What a great group of friends.  I am happy that a bunch of us are moving on to more cooking classes together, and sad to see others go!  We had so much fun in that class, and we learned a TON.

We had our lab final exam a couple of weeks ago, and I am SUPER happy at how it went.  We had to perform a few different knife cuts, like brunoise, julienne and tourne, and make perfect over-easy eggs.  We also had to break down a chicken (the chef asked me to walk mine around the room as an example to everyone else!), then make a stock.  We made saffron rice with the stock, seared chicken breast with pan sauce, and asparagus.  Mine turned out very well - the chef said it was great!

Here is my final plated presentation...not too shabby, if I do say so myself!!


I have a few posts planned for the next few days...stay tuned!  ;)